04 Mar 2025
I'm using Airtable Interfaces a lot, to pilot my automations. For a project at work I built a whole pipeline to help us organize meetups in our office. It starts with the URL of a meetup.com event, and ends with the printing of the signs to put in the building, and goes through all the phases of calculating the number of pizzas needed, booking rooms in the corporate calendar, printing badges for attendees and pre-generating internal Slack messages, etc.
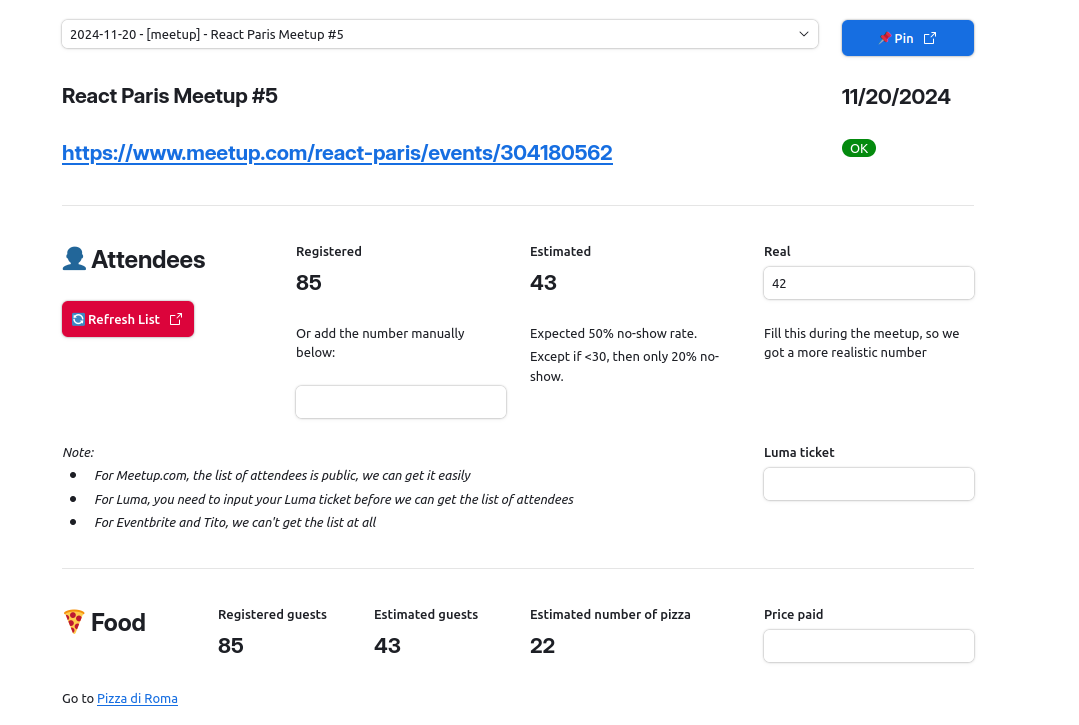
But the process is made of multiple steps, that having all the info on one page was getting overwhelming and very practical, so I started splitting it into several pages. One page would handle the attendee list, another would take care of the calendar, another of the Slack messages, etc.

The issue I ran into though, was that whenever I would switch pages, I would lose the context of which meetup I'm currently editing. For example I would start on the "Metadata" page for the upcoming React Meetup; I would then click on the "Calendar Events" page and would somehow now be editing the upcoming Algolia Search Party.
This is because, from Airtable Interfaces point of view, each page is an independent context, and there is no default way to keep the currently selected Event from one page to the next.
My hackish workaround
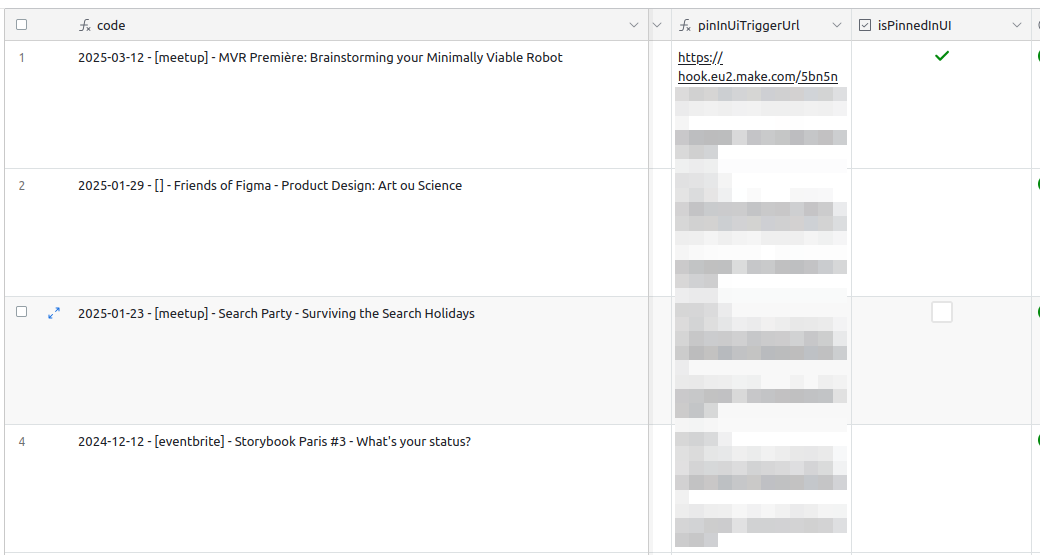

The (very hackish and imperfect) way I found around this is to add a isPinnedInUI checkbox field to my table. Only one element of the table should be marked as pinned at any given time. I also configured the record picker to select the fields where isPinnedInUi is true in priority.
I also added a custom Make scenario (trigger when clicking on the Pin blue button next to the record picker) that would uncheck the previously checked element, and check the currently selected one.
That way, when I'm working on an event I can pin it in place, and keep its context even when navigating from page to page.
Of course, this is just a bandaid, and fails as soon as more than one person is working on the dashboard at the same time. If I start pinning a meetup and my coworker Lucas is working on another one and pin the other, we'll just step on each other's toes. But so far, it has been an improvement over completely losing the context.
21 Feb 2025
I'm often taking audio notes with my phone recorder app. I then have a make.com workflow in place where I push the audio file through Whisper to get a transcript of it, and start other workflows based on the content of the transcript.
Sometimes it's just a simple note to remind me to do something, which gets added to my TODO list. Sometimes it's an idea about a blogpost I'd like to write, which gets added to my list of blogposts drafts. Sometimes it's the recap of the latest TTRPG game we played, which gets added to our campaign document.
Most of those recordings are only a few minutes long, but the last kind (the TTRPG session recap) can get lengthy, and I've already ended up with files of up to 50MB. Whisper has a limit of 25MB, so I had to come up with a way to decrease the filesize before sending it to Whisper.
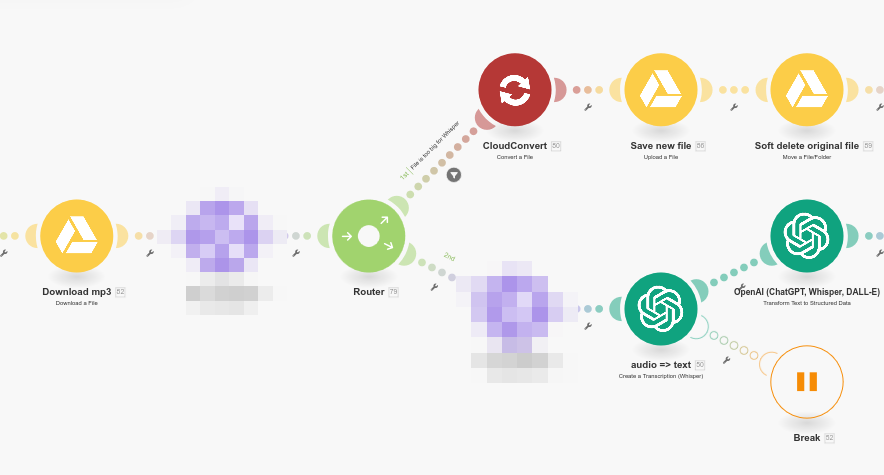
I now have two paths in my make.com scenario. The bottom one is the happy path, when the filesize is below 25MB. The top one is only triggered when the file is too heavy.
In that case, I push the file through CloudConvert, to get a lighter version, and then I go to the second branch with that compressed file instead of the default one.
Compression settings
Whisper doesn't need very high audio quality to create a transcript, so I can compress pretty aggressively and still get a good transcript. What I found to be impactful is to:
- Format: Convert from
mp3 to m4a with the AAC codec. Slightly lower filesize for equal quality. - Channels: I set the channels to 1, actually making it a mono rather than stereo file.
- Audio bitrate: I halved it down from
128 kbps to 64 kbps. - Sample rate: I also halved it from
44.1 kHz to 22.05 kHz
In CloudConvert parlance, this means setting conversion and engine specific options as:
audio_codec set to aacchannels set to 1audio_bitrate set to 64sample_bitrate set to 22050
I'm not doing this conversion on every file, only on those that are too heavy. CloudConvert free plan allows for up to 10 conversions per day, which is enough for my needs. The conversion takes a few minutes to run, and again, that's fine for my current needs.
The final quality of the audio is clearly inferior to the original, but this doesn't seem to bother Whisper at all, which can still create a good transcript out of it.
Hope that help other people get over the 25MB limit of Whisper.
23 Jan 2025
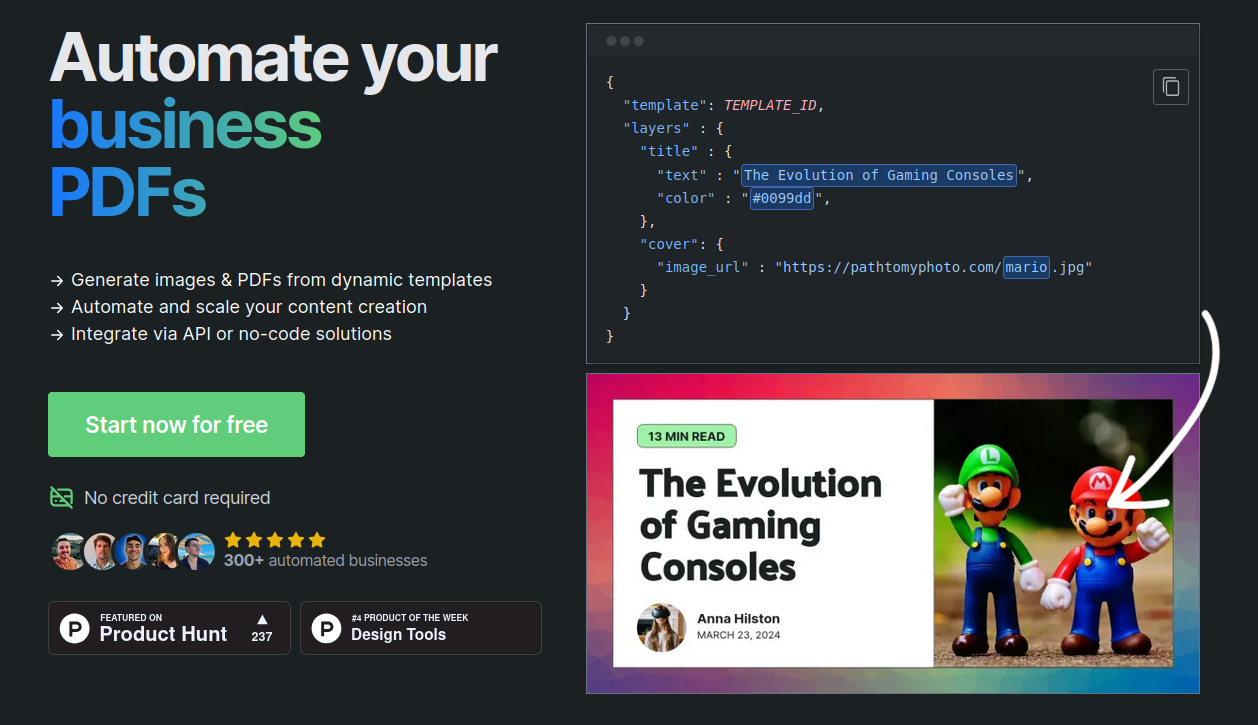
In my recent no-code plunge, I discovered templated.io. It's an online service to generate images based on templates you create yourself. The first use-case I had for it turned out to be a bit too complex for what it offers, but I've now used it for something where it shines much more.
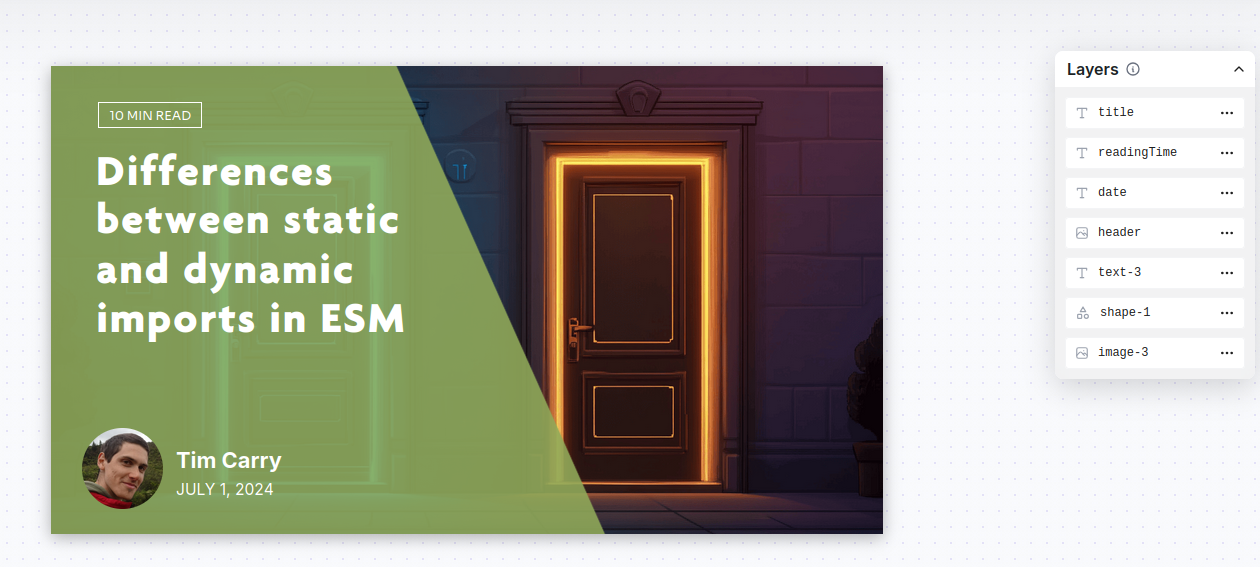
You might have stumbled upon this post through the embedded link on Bluesky, and the image for the link has been generated by templated.io.

templated.io basically gives you a simple template editor, where you drag and drop shapes, text elements and images. You assign a unique name to each of those element, and then you only have to call the API with an object of key/values to update the content of those shapes.
I used one of the default templates, adapted to my need by changing the default colors and putting my name and face. For the title, image and date, I used placeholder values (taken from a previous blogpost, to see what it would look like), and named the layers with expressive names.
Now, all I had to do was call the API with an object with what I wanted to update:
[
        {
            "format": "png",
            "layers": [
                {
                    "text": "Generating Bluesky Embed with templated.io",
                    "layer_name": "title"
                },
                {
                    "image_url": "https://v5.airtableusercontent.com/v3/u/37/37/1737655200000/7NVVJoNpTRdQFwaUSRKRyw/Ej4K-pKgYMhRgTHRyE2fvR-wnxZi_F-0LsmVTkHLJf1dpH1bcuuU3RVq3msHLNdyhdXKIVnewk9JXhhbpaiKiJc1uPt0YNYx6XyE8xH6UDMd02NJsEymlaYZUQlr6_L7H89PporK28x_HAcpqEdWSg/vJC1yCgppLMCByrKcLkJ8yMV60DIbAsMzNUuX9wMC4M",
                    "layer_name": "header"
                },
                {
                    "layer_name": "date"
                },
                {
                    "text": "8mn",
                    "layer_name": "readingTime"
                }
            ],
            "template": "857483bf-d4e3-4cf1-a32e-83d85d379314",
            "transparent": false
        }
]
I had a wow effect very rapidly on this tool, as it "just works™" with a very simple interface to use, and they even quickly show you the API calls to do. It's really built with the API in mind.
In the past I had tried to do the same thing with the Google Slide API, but the API is at least 10x more complex to use. I even considered using tools like Figma (whole new level of complexity) and Canva (that doesn't even have an API). Here, it took me about 5mn to have something working.
The first time I used the app, a sales person reached out to me through the integrated chat. While I don't usually like this kind of sales intrusion, the conversation was cordial, and I could see that they had really taken the time to check my blog (based on my email address) and offered assistance without being pushy. It was very refreshing from the usual sales interaction I had with other providers.
After a bit of discussion, I even realized the "sales person" I was talking to was actually the sole developer of the whole app, doing everything. That gave me even more respect for the work put in place here.
So, in a nutshell, templated.io is simple and effective, it does exactly what it's supposed to do and does it well.
21 Jan 2025
This article has probably be written hundreds of times already, so I don't think I'm adding anything new to the overall tech knowledge online, but hey writing it will probably help me remember it better.
In modern (ie. ESM) JavaScript, you no longer use the old require() method to load your dependencies; you use import instead. What I didn't really realize at first when I started migrating my codebase to ESM was that import comes in two flavors: static imports and dynamic imports.
Let's assume the following two dependency files:
// defaultExport.js
export default {
  name: 'Tim',
};

// namedExport.js
export const greetings = function greetings(name) {
  console.info(`Hello ${name}!`);
};
The first one is doing what we call a default export (using export default). The other is doing a named export (using export {something}).
Static imports
import config from './defaultExport.js';
import { greetings } from './namedExport.js';

greetings(config.name); // Hello Tim!
Using static imports, I can import either the default export with the import name from ‘./path.js syntax, or a named export with import { name } from ‘./path.js (the difference is in the { } wrapping the name).
The good: They sit at the top of the file, defining the needed dependencies. They are a staple of ESM, and allow for tree shaking your dependencies (ie. removing all dead code). They should be the most common kind of imports.
The bad: As they load dependencies statically, they won't "fail" in case of a cyclic dependency by default (you'll only realize something is broken in production, when suddenly one of your deps is undefined). Thankfully ESLint can help you catch this.
Dynamic imports
const config = (await import('./defaultExport.js')).default;
const { greetings } = await import('./namedExport.js');

greetings(config.name); // Hello Tim!
Using dynamic imports, I can still import both default exports and named imports, but there are a few subtle differences to keep in mind. The await import() call returns an object that contains _all _the exports of the module, both default and named.
*The good: *If you need to access named imports, the change in syntax is trivial. The { } now acts as an object destructuring, and allows you to access and define only the keys you're interested in.
*The bad: *Access default exports though requires you to specifically target the .default key of the returned object. Because import is asynchronous, it also requires you to wrap your await import() call in ( ) to actually return the .default key of what the promise returns, rather than the .default key of the promise itself (that doesn't actually exist).
What to use when?
I tend to use static imports 90% of the time.
I only ever use dynamic imports when:
- I need the module to specifically be loaded at a certain point in time (maybe because I don't yet have all the config ready before that)
- The module is slow to load (it does a lot of stuff when imported) and I want to delay that to a more appropriate time.
- I have a wrapper function that can do a bunch of different things, and I want to only load the required dependency modules based on what the function will actually need.
When this happens, I make sure that I don't forget to grab the .default key (but as I tend to prefer named exports anyway, most of the time the change doesn't require much thought).
21 Jan 2025
If you write anything in JavaScript, you've certainly encountered the this keyword, and wondered what is this? Even if you're an experienced JS dev, sometimes this can bite you in unexpected ways.
This happened to me today, while porting a codebase from the got library, to the builtin fetch method. I had a method to write that was doing a bunch of API calls (using fetch), massaging the data I got from one endpoint, and sending it to another.
To unit-test that method, I didn't want to do actual API calls, but rather mock the calls, and return fake data to simulate a real call exchange. My test needed to assert that one of the calls in the pipeline was using the right headers.
// main.js
export default {
  async run() {
        // Here I do a bunch of chained API calls
        // [...]
  },
  __fetch: fetch
}

// __tests__/main.js
vi.spyOn(main, '__fetch').mockReturnValue({...});
Instead of using fetch directly in my run method, I added the __fetch key into my object, and would call this.__fetch instead. That, way, I could spyOn the method and mock the returned value. As main.__fetch would become a mocked function, I could also run asserts on it to check if it had been called enough times and with the right number of arguments.
That works perfectly and my tests all pass \o/
But it fails in production
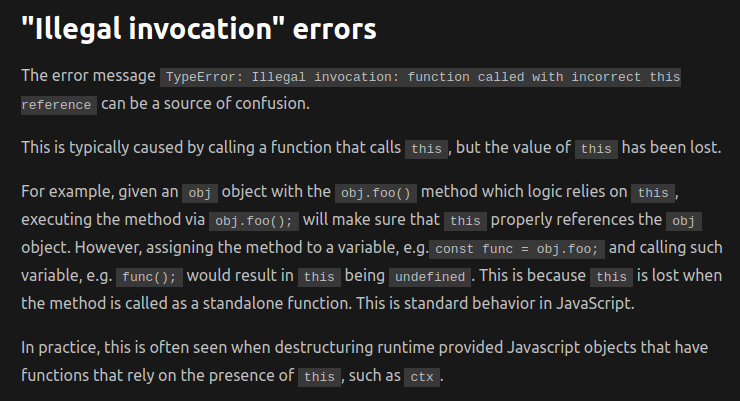
Weirdly enough, even if tests are passing, the code doesn't actually work in production once deployed to Cloudflare workers. What I got instead was a nice TypeError: Illegal invocation: function called with incorrect this reference error.
Turns out it's a well known and documented type of error on Cloudflare Workers. Their documentation even has a dedicated part about it.
What's happening is that once the code is bundled with esbuild before being sent to Cloudflare workers, the reference to this inside of fetch is lost.
The solution
The fix is surprisingly simple. Instead of attributing __fetch as a reference to fetch, all I had to do was to define a new function that would simply call fetch.
export default {
  async init() {
        // Here I do a bunch of chained API calls
        // [...]
  },
  __fetch: async function(url, options) {
        return await fetch(url, options)
  }
}
This creates a wrapper around fetch, so its this isn't lost.
This might look like repetitive code, but the wrapper actually has a use. I made sure to add a comment around that wrapper so future me doesn't inadvertently "optimize" the code and break it.